描述
Summary:
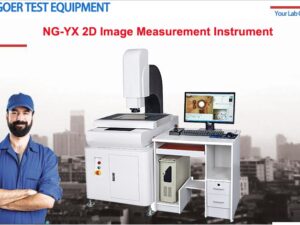
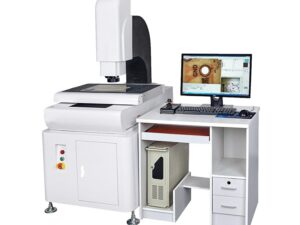
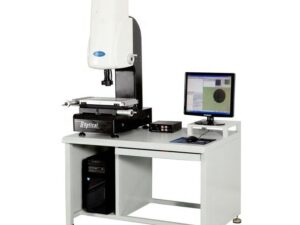
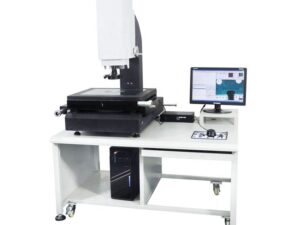
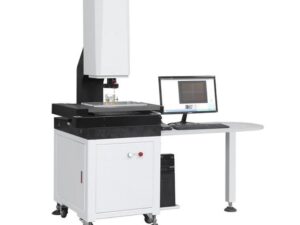
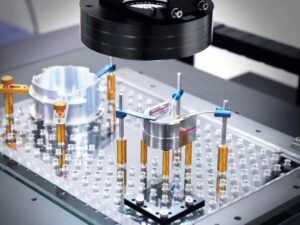
Professional clamping methods, allows you to test accurate and productive.Using optical principles, non-contact test measurements;Applicable to all areas for the purpose of twocoordinate measurement; It is the best measurement solution for small, thin, soft and parts. Accurate measurement of points, lines, circles, angles, etc.And has a powerful report output function, high quality, economical, practical;
Features:
Professional clamping methods, allows you to test accurate and productive.
Hardware, main features:
The design of precision transmission equipment enables rapid movement.
High-precision marble base and column frame are stable and reliable.
Precision P-class linear guides and V-guides are highly linear.
Ensure machine accuracy and service life.
Japan Sony color CCD, has a higher clear measurement screen.
Contour light, surface light, coaxial light (optional) Flexible lighting, high definition, extremely accurate measure.
Guiyang Xintian precision optical ruler is 0.001mm, which is very important for every 1μm.
2D software, function introduction:
※ Element measurement: measuring points, lines, circles, arcs, angles, ellipses, specifying points to measure rectangles, automatically identifying points, lines, circles, arcs.
※ Element structure: center point structure, intersection structure, midpoint structure, line structure, circle structure, angle structure.
※ Element presets: points, lines, circles, arcs.
※ Graphic processing: coordinate shifting, workpiece alignment. Any axis is squared and the coordinate system is reset.
※ Graphics zoom, graphics zoom, graphics shift, graphics print graphics selected, unchecked, graphics deleted.
※ Set zoom, graph zoom out, graph print circle select, uncheck, graph delete.
※ Set the grayscale, saturation, contrast, and image of the image to be saved in BMP format.
※ A variety of edge-finding modes, the computer automatically picks points, automatically recognizes the circle and the arc greatly improves the picking speed.
※ The image supports S terminal input; the image size is 640*480mm. Measurement data is sent directly to AutoCAD, and the measured graphics can be saved in dxf documents. Measurement data can be sent to WORD, Excel, for statistical analysis, you can draw a simple Xbar-S control chart, find Ca, and other parameters. Multi-language interface switching.
Specifications :
Model
NG-YX2010
NG-YX3020
NG-YX4030
NG-YX5040
Test Range(mm)
200*100*200
300*200*200
400*300*200
500 *400*200
Overall dimension (mm)
525*677*9080
625*777*1080
725*877*1180
825*1077*1280
Working stand size ( mm)
360*260
460*360
560*460
660*560
Weight (kg)
220 kg
280 kg
350 kg
420 kg
Load bearing (kg)
20 kg
20 kg
20 kg
20 kg
measureing precision (um)
XY(3.0 + L / 200)μm
grating ruler resolution
1μm
guide rail
Taiwan brand, P grade
Camera
SONY color 1/3″ CCD camera
light source
Rim light
White LED luminance could be continous adjusted.
Surface light
White LED luminance could be continous
Optical lens
manually continous zoom and electric postion lens (optional)
Zoom ratio
Optical zoom ratio: 0.7-4.5 times, image zoom ratio: 30-225 times
work distance
90 mm
Software
DL Measurement Software (DL Manual Edition)
motion control
Manual control
work environment
※ Temperature : 20℃±5℃
※ Temperature changes :﹤2℃/hr
※ Humidity range: 30-80%
Vibration range ﹤0.002g and lower than 15Hz
Power
(electric equipment need be reliably close to ground, resistance need lower than 4 ohm.)
Dünya Çapında Teslimat
200'den fazla ülke ve bölgeye gönderim.
Güvenli Ödeme
Dünyanın önde gelen ödeme çözümleri.
%100 Para İade Garantisi
Birçok üründe 14 gün içerisinde koşulsuz iade politikası.
7/24 Teknik Destek
Her zaman bize istediğiniz yerden ulaşabilirsiniz.
Yardıma mı ihtiyacınız var?
Optik Görme Görüntü Ölçüm Sistemi, 2D Video Ölçüm Makinesi
Marka:
SKU: CM-XHEVF
Kategori: Analiz - Test
Güvenli Ödeme
SSL Şifreleme Teknolojisi ile işlem güvenliğiniz sağlanmaktadır.
Ayrıca kişisel veri güvenliğiniz ve ödeme bilgileriniz de en son teknoloji ile korunmaktadır.


